Showing posts with label textiles. Show all posts

Tuesday, 29 January 2013

Project - Feminine Tops

There's been a resurgence in soft, fluid tops on the runway and in the stores, and I must say I'm happy to see that! Button front georgette blouses, boho silk tunics, chiffon poet's blouses - the styles are endless. You can dress them up or down by pairing a feminine top with jeans or tights. Wear one to the office under a blazer with trousers or a slim skirt. I love the carefree style and how non-constricting they are compared to slinky knit tops or crisp cotton shirts. I made two of these tops recently from a vintage pattern - Butterick 6037.


A few modifications were made in the first top as I didn't have quite enough fabric. I omitted the facings and bound the neckline in self-fabric instead. I also included a center front seam to accommodate the neck binding.


On the second top below, I lengthened the sleeves. Otherwise everything else was true to the pattern.


Sunday, 2 December 2012

How-to - DIY Curtain Calculations

Curtains can be costly to buy or have custom-made, especially if you want quality materials and workmanship. If you can sew a straight line and take some measurements, you can make your own at a fraction of the cost. Below you will find the steps to calculate the amount of fabric you need to sew your own curtains.

  
Measurements will be taken in inches and converted to yards or meters. The two styles of curtains typically sewn are gathered or pinch pleats.

!  There are 36 inches in one yard and ~ 39 inches in one meter.

1.      Decide on the style of curtain you wish to sew – gathered or pinch pleats
1.1.    Gathered curtains have a multiplication factor of “2”
1.2.    Pinch pleated curtains have a multiplication factor of “2.5”

2.      Measure your window frame width from wall to wall
2.1.    Add 10 inches (25cm)to the measured width
*   This will allow 5 inches (12.5cm) per side for seam finishing etc.

3.      Measure your window frame height from top to bottom
3.1.    Add 12 inches (30cm)to the measured height
*   This will allow finishes of 5 inches (12.5cm) for the header and 7 inches (17.5cm) for the hem

4.      Choose your fabric and measure the width from selvage to selvage

! Most standard fabric widths are 36, 45, and 54 or 60 inches; specialized drapery fabric can be wider.

5.      Determine if the fabric has an obvious pattern that repeats or a “nap”
*       No – Proceed to Step 6
*       Yes – Measure the length of the repeat interval (ex. The pattern repeats itself every 20 inches) and proceed to Step 6

6.      Multiply the total width measurement in Step 2.1 by the multiplication factor for your  chosen style of curtains in Step 1

7.      Take the number in Step 6 and divide it by your fabric width
1.1.    Is the number a whole number? (ex. 5 or 5.1)
*       Yes  – Proceed to Step 8
*       No  – Round the number up to the next whole number and proceed to Step 8

! The number in Step 7 will be the number of fabric panels or pieces required to cover your window from the fabric width and style chosen.

8.      Determine the total length of fabric required in inches
1.1.    For fabrics with no obvious pattern repeats or a "nap", multiply your number of fabric panels in Step 7 by the total height measurement in Step 3.1
1.2.    For fabrics with a pattern repeat or "nap", divide the total height measurement in Step 3.1 by the repeat interval measured in Step 5 (this will determine the number of pattern repeat intervals per fabric panel)
1.2.1. Is the number a whole number? (ex. 100 or 100.2)
*       Yes  – Proceed to Step 8.2
*       No  – Round the number up to the next whole number and proceed to Step 8.2
2.       Multiply the whole number by the repeat interval in Step 5
3.       Multiply your number of fabric panels in Step 7 by the number in Step 8.2

9.      Convert the total inches of fabric required for your curtain project to the appropriate measurements.
1.1.    For fabric requirements in yards, divide your number by “36”.
1.2.    For fabric requirements in meters, divide your number by “39”.

10. Round the converted number up or down for fabric purchase.

Saturday, 3 November 2012

Project - Dining Set Redux

This next project I tackled is home dec related. I don't normally do home dec projects, but it was either try and redux this dining set or shell out a few hundred dollars for a new one. I chose the former and added chair cushions, covers and even recovered the table top with a water proof nylon.

Before
I had all the materials needed (fabric, stapler, double-sided tape) so all I invested was my time. The fabric came from my extensive cache (which could do with some reduction) and for the chair padding I used pieces of foam mat (the kind used in children's play rooms etc.). As a side note, these mats are wonderful for laying on your floor and cutting out fabric and patterns. I don't have a large cutting table so I lay my fabric and pattern pieces on the floor, on top of these mats to prevent damaging the floor.

I'm quite pleased with the finished product. This dining set has been through three moves and has dings and dents as a result. Reduxing gives it new life until I'm ready to upgrade.


After


Thursday, 28 July 2011

DIY Vintage

Love spats but can't find them no matter how hard you try? Or perhaps you've seen an outfit on "Mad Men" that you'd love to re-create?  Why not make them yourself!

Many thrift and vintage stores sell fabrics and textiles from the past.  Women often made their own clothing back in the day, so don't be surprised to find retro barkcloth or polyester double-knit leftover from a sewist's past projects.  You can also find vintage sewing patterns, which are highly collectable these days.  I must admit, these are other addictions I have along with handbags and purses - sewing patterns and fabrics.

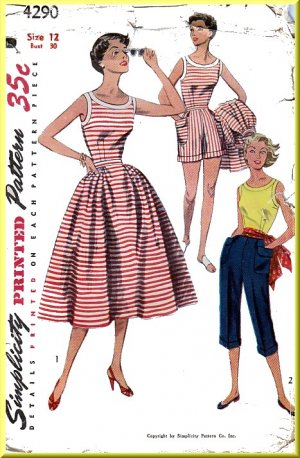
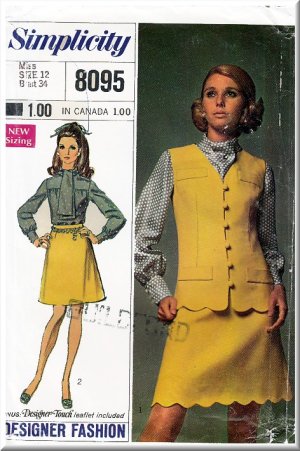
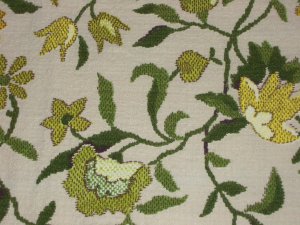
Below is just a small sample of items in my collection.  While I may not have grown up during those times, I am fond of the nostalgia that vintage items bring.